There may be times when you would like to reference a page, or node, from another place in the menu. While the page/node can only live in one specific location, you can manually create Menu Items to accomplish this cross-referencing. Note this process does not however necessarily change the active trail/breadcrumb path to the page, as it may default to the primary page's menu placement.
Use the manual entry process if you want to:
- add additional links to an existing page under different sections of the menu, or in other menus
- link to pages/forms on external websites
Watch the Video Demonstration/Tutorial for this.
To manually add new links to the Main Menu:
- Hover Structure, Click Menus
- Select the "List Links" option for the particular menu you wish to modify.
- Click Add Link
The default view of this page is "List items" which will show the hierarchy of pages on your site. Above the list, you will find a button to Add an Item.
Select Add item.
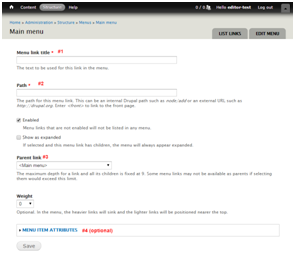
In the screen that appears,
- Assign a Menu Link title (this is what will appear as the menu item)
- Assign the URL to link to in the Path field. If linking to an internal page of the website, it is recommended you link by node ID. For example node/123. You can obtain the ID by hovering the “edit” link on the content management screen listing that page for editing.
- In the Parent Item section, select the appropriate subsection of the MAIN MENU to insert your new menu item.
- Optionally, if linking offsite- you can set the link target to a new/blank window under the Menu Item Attributes Section.
- Save the menu item entry.
Proceed to the Setting the Display Order of Menu Items section.