For some content types, there may be a distinct image file field used to upload the image that may be used as a thumbnail or background image on the content template. Before uploading any images in this field, be sure you have processed/optimized your photo for use on the web.
Watch the Video Demo/Tutorial for this.
Initially, these fields appear as standard file upload fields as indicated below. Photo/Image size and dimension recommendations and constraints are listed immediately below the choose file/upload buttons.

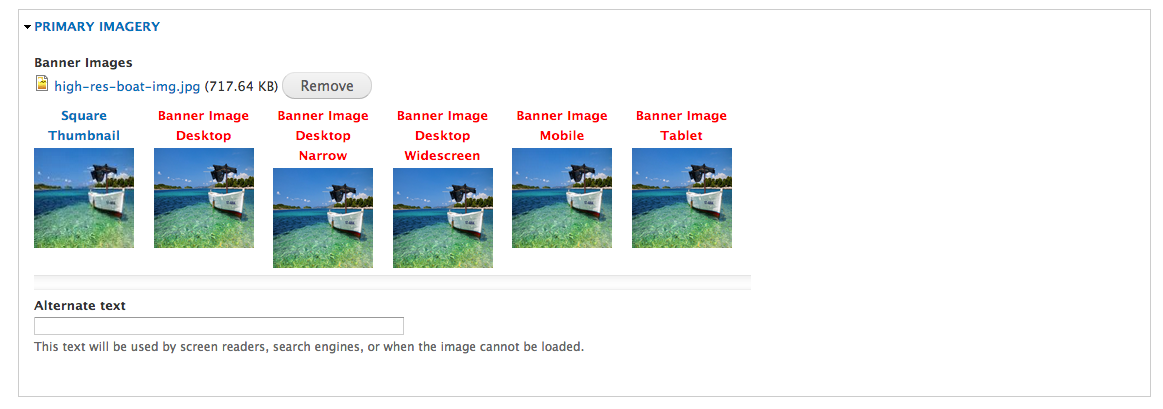
After uploading an image file, the image file field area will refresh to indicate the file has been uploaded and may present the manual crop feature and/or an alternate text field as indicated in the two screenshots below.

If your site must comply with accessibility regulations, be sure to assign Alternative Text (Alt Text) that describes the contents of the image/photo. Alt Text should not include the words "photo", "image", "pic", "picture" as part of the description.
Manual Crop Feature
Depending on your site's settings, some image fields may be configured to use the Manual Crop feature. This feature allows for defining various crops of one source photo. These crops in turn can be used for different layouts and templates featuring the selected content on the site.
NOTE: As a general rule of thumb, pictures being used/uploaded to the website should not be the originals from any digital camera, but downsized in advance and ideally, saved at 60-70% compression in jpeg format. This should result in the file storage size of the image to be less than 5MB, hopefully less than 3MB. The image cropping tool (when enabled) is meant to serve for small alignment/crop adjustments and never for overall resizing of images. For recommended dimensions to crop/downsize to, refer to your individual image field settings for your CMS.
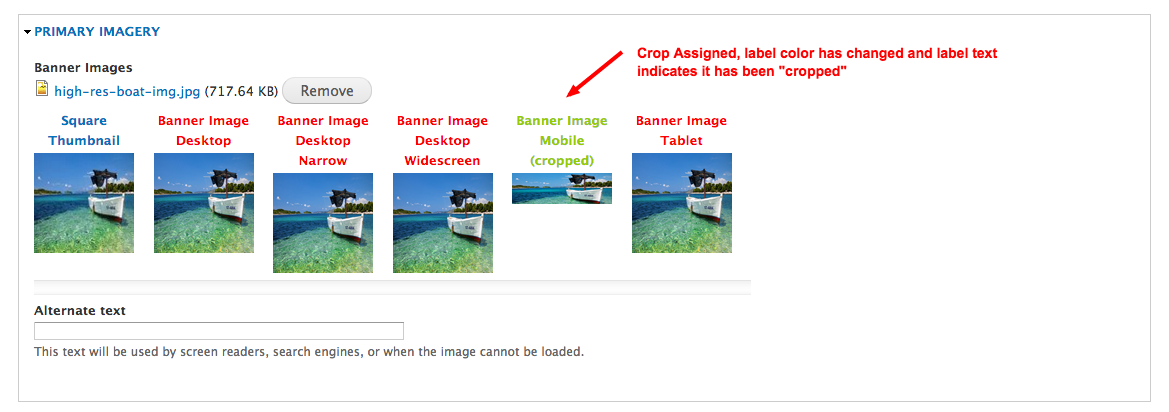
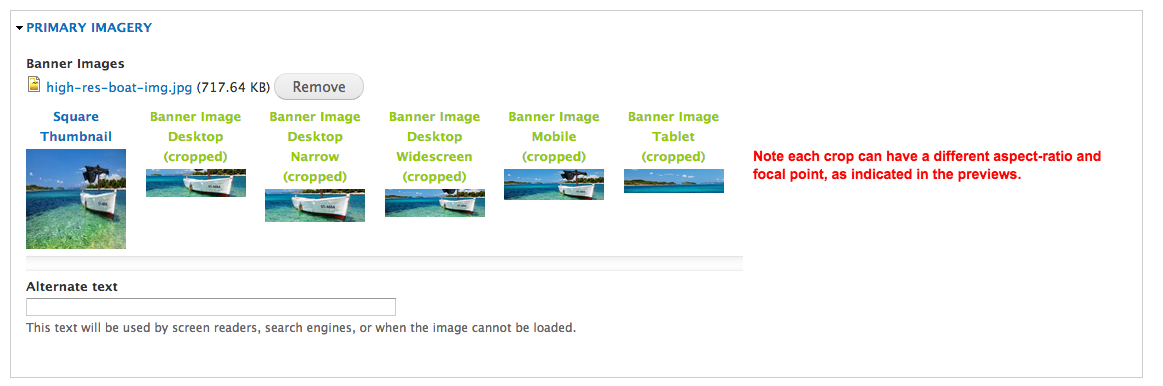
If specific crop styles are required, then each will be listed in the interface in red until they have been established, at which point the crop-style label color will change and text will be updated to indicate the image has been "cropped" as shown below.
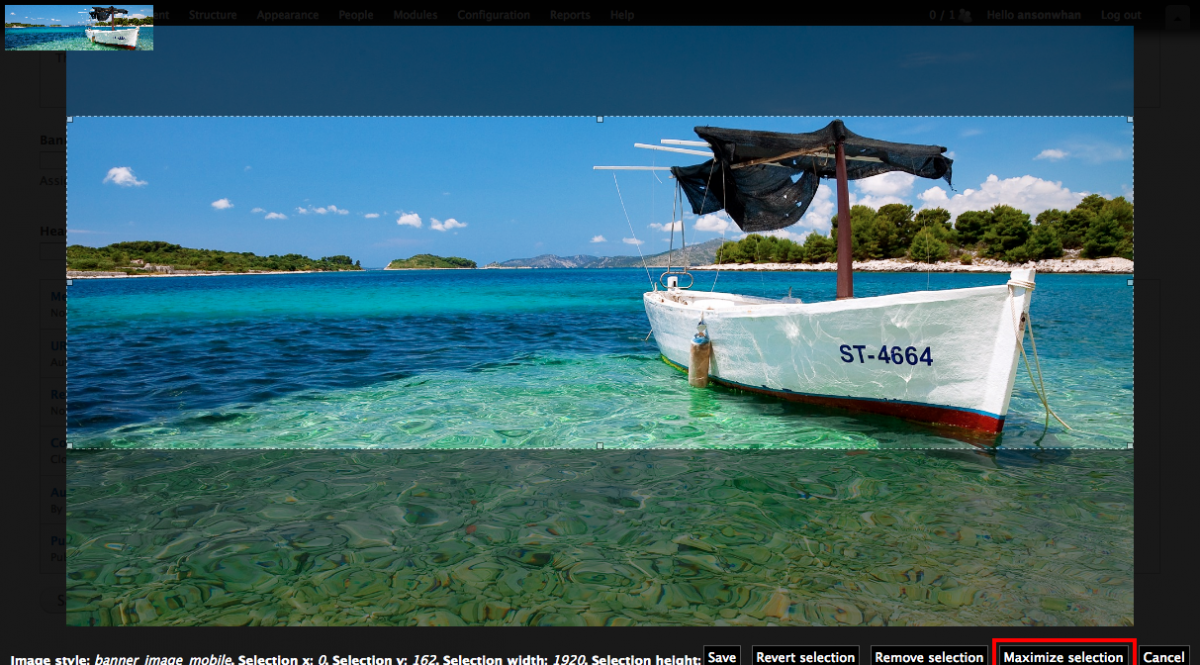
To define the cropped region for a particular style, click on the thumbnail image or crop style label. This will open an overlay of the image with a predefined rectangle of the crop area at 100% size as shown below.
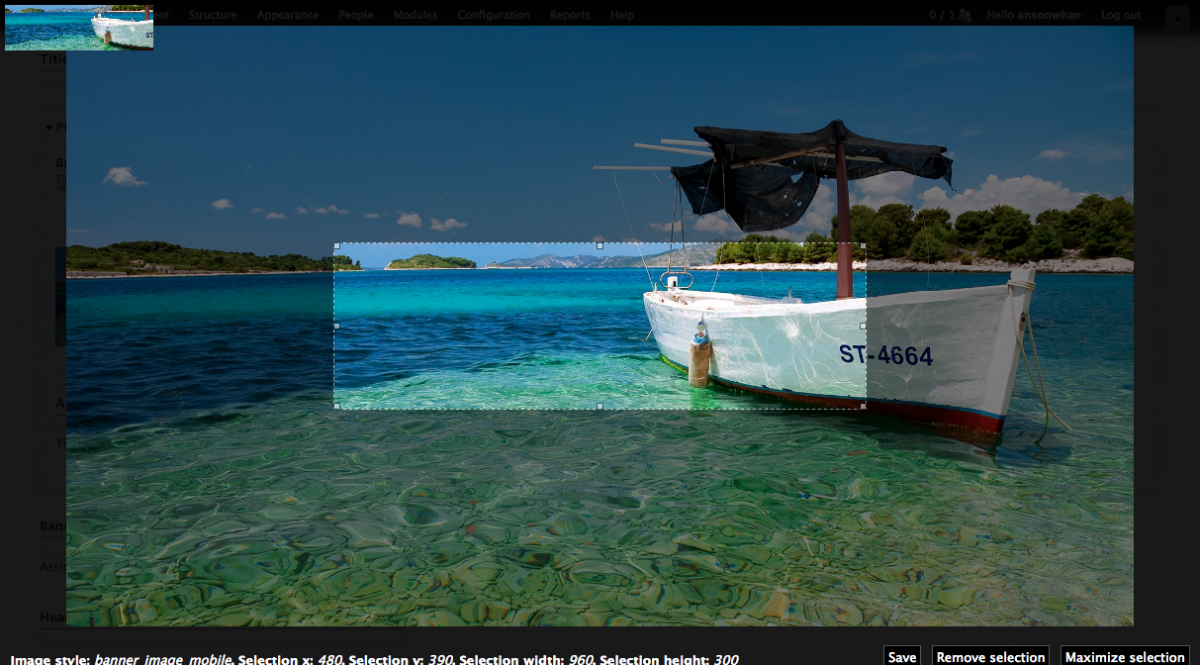
At the top left corner of the overlay is a preview of the cropped region. At the bottom are shortcuts to:
- Save the selected crop region
- Remove selection
- Revert selection (revert crop region selection)
- Maximize selection (to scale the predefined rectangle proportionately as large as possible; enlarging the crop region- but resulting upon save in scaling down the crop region to the desired size)
If you inadvertently opened the manual crop screen, use the escape [ESC] key to back out.
The screenshot below demonstrates a maximized selection.
After you've assigned all the crops, the image field thumbnails should reflect each one. Note: you can have different focal points for each crop.
Troubleshooting: Crop Settings Not Saving or Reflected on Front End
Swapping out/replacing an existing image on the site with another:
- edit the respective piece of content in the CMS, upload the replacement image [using a different filename (different in wording, do not simply append a number at the end- Drupal already does this) to bypass caching and reflect the new image immediately.], perform final cropping online, saving the piece of content.
Crop settings for the image are not reflected in backend upon return to edit the content:
- If upon returning to the edit page, the crop thumbnails do not reflect the desired crop, try recropping and saving one more time. If they still don't reflect the crop, chances are the image uploaded does not meet minimum requirements or exceeds recommended maximum criteria.
Crop settings for the image are reflected in edit form after save, but not on the front-end. This usually reflects a caching issue.
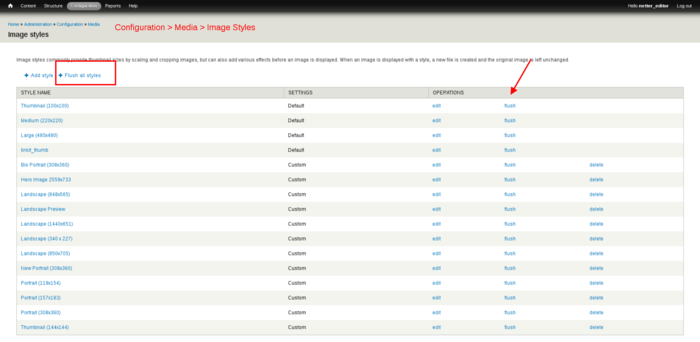
- If the edit page does show the cropped thumbnails, but the front end pages of the site does not, this is an image caching issue. Content managers and site managers can manually clear Drupal's image style caches, forcing a regeneration of the thumbnails reflecting the saved crop settings. To do so, go to Configuration > Media > Image Styles. Click the link to flush all styles near the top left, or the "flush" link on the corresponding individual image style.
- Additional Cache Management: After flushing image style caches, you may also want to flush the content cache, by hovering the Home icon and clicking "flush all caches". For time sensitive content changes, you may also need a website administrator to flush the Varnish caches at the Pantheon hosting server level. Cache flushing should be done in this order, as the image style caches are not included in the "flush all caches" operation; and Varnish caching will take snapshots of what the Drupal database has cached/serves to the requesting computer.
Attached is a screenshot of the image styles landing page with the "flush all styles" link and individual "flush" operations [available only if the add-on module is installed and enabled on your site].